
SK-Hang Glider Model with Mamo II Control System
Recent experience has shown that only SK models with magnetic control are successful in slope flying. The most proven model in this “test category” was developed by Paul Sommer of MG Affoltern, a multiple Swiss champion and European Cup winner. He has kindly shared his experiences and documentation with us.
The very simple Jeldsky-style construction makes it easy even for beginners to get a feel for this interesting category. The build time of about 20 hours is also significantly shorter than that of a standard sailplane of the same size. Precise construction is essential for good flight performance.
Use a soft Pavatex sheet measuring 140 x 20 cm as your building board. Rub soap onto the blueprint so that the glue spots don’t stick to it (you can also cover it with tracing paper, etc.). First, we glue the nose strip (Item 3) to the profile board (Item 1). Make sure the profile is correct: the nose radius should face the straight underside of the profile board. All wood-to-wood and wood-to-balsa joints are secured with white glue. Use Brittfix only for balsa-to-balsa joints. The drying time is at least 20 minutes. We temporarily secure item 1 to item 2. Now we can fold open the wing board like a hinge and apply glue to the resulting joint. Close it immediately, pin it to the plan, and use the first, middle, and last ribs (item 5) to fix the exact profile alignment. The remaining ribs can then be inserted. The wing board must be cut to the exact width beforehand. The end strip (4) is glued in place in the same manner as items 1 and 3. After constructing the hinge box (items 15 and 16), glue the parts together. The dimensions must be adjusted to fit the sash profile. Cut out rib (17) accordingly and glue both pieces to the sash. It is best to secure it with two screw clamps and appropriate shims (to prevent indentations). The aluminum tab (19) can be easily cut out with a small metal saw blade so that it can later be riveted with No. 33. To do this, drill two holes ( $∅$ 3 mm) diagonally through parts No. 19 and 33. Countersink both sides diametrically at $90^\circ$ until a countersunk rivet (3 x 5 mm) fits. Using a vise, we can now press the rivet flush with parts No. 19 and 33. The end rib (18) is first sawed out in a rectangular shape
. Only the slot for the tab is cut precisely. Next, we insert the end rib (18) with the tabs (19 and 33) into the tab box, allowing us to transfer the exact shape from the wing side. After cutting it out completely, glue it in place in the same manner and secure it with clothespins. Once it has dried sufficiently, we can turn our attention to the wing end. First, we attach rib (6). Then we cut the wing board (13) exactly to size and attach the end strip (14). A 35 mm sweep is applied to the airfoil board (1). Now we first glue on the ribs (7, 8, 9, and 10). This provides a good support for the wing board and also ensures the correct angle of attack. Since an SK model is very delicate during flight testing, I strongly recommend—especially for beginners—cutting out the trim tabs (12) and reattaching them with the hinge plates (32). These should be only just movable afterward.
The final step on the wing is to glue on the end rib (11) and sand the entire airframe smoothly.
First, we cut the stringers (21 and 23) and frames (24) to size. Next, we secure the right stringer (21) to the template and glue both stringers in place at the same time using the frames (24). After the glue has dried, sand the top surface and glue the left stringers (21) in place. Using a large flat file, we file out the recesses for the reinforcements (22). The slots in the reinforcements are cut into each other. After gluing them in place, we can cut out the slots in the balsa wood (21). Fit and sand the fuselage ends (25) and fuselage nose (20).
Same design as the Luckystar. Description in MFS No. 10, October 1973.
The entire model is coated with a special clamping varnish (e.g., Kö-C), sanded with 160-grit sandpaper, and coated again. Watch out for drips! After coating, the model should be clamped for about 1 week to minimize warping as much as possible.
Assemble the entire model. You may need to pull the wings together with a rubber band. To do this, you can attach two wood screws (M3) to the bottom of the wing box.
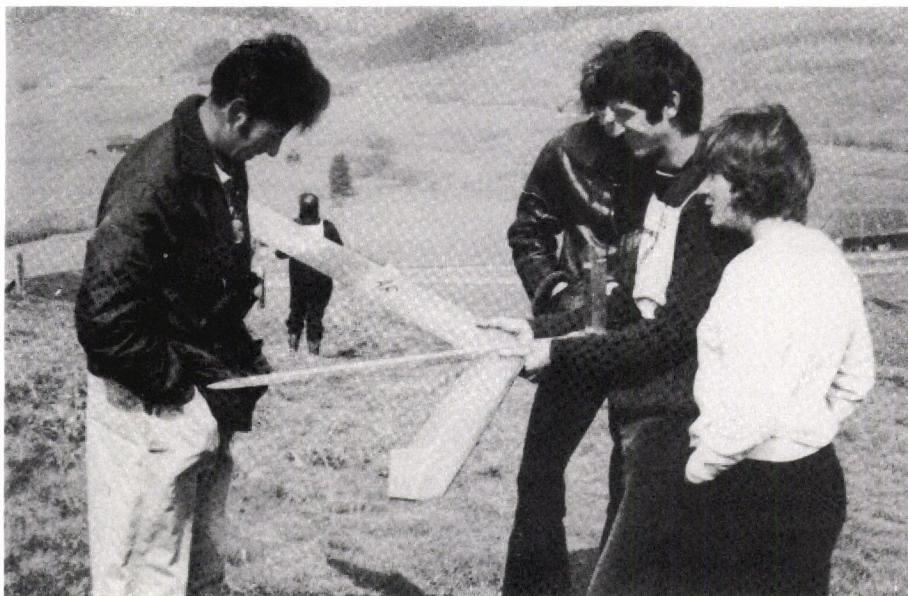
Now fill the lead chamber at the rear of the fuselage until the model is balanced at the center of gravity (S). The model should also be balanced along its longitudinal axis. This can be corrected by adding a small amount of lead to the corresponding wing tip. Set the trim tabs (12) and the rudder (29) to neutral. Calm winds and flat terrain are essential for a successful first flight. You can now attempt the first flight. Hold the model by the fuselage at the center of gravity. It requires significantly more run-up than standard models. If the model dives too steeply toward the ground: Add more lead! If the model pitches up, remove lead until you achieve a glide of about 20 meters with an outstretched arm. Course corrections can now be made using the trim tabs. The trim tabs are also used for fine-tuning the glide. To do this, we must adjust both tabs equally upward or downward.
I hope you enjoy building and flying this model. W. Heise
Construction plans are available from the editorial office or directly from the author, W. Heise, Im Isengrind 35, 8046 Zurich
STK | DESCRIPTION | MATERIAL | SCALE | NOTES |
|---|---|---|---|---|
1 | THREADED BOLTS M6x6 | STEEL | ||
2 | TRIM LEVER | ALUMINUM WEIGHT | ||
3 | SIDE PINS 6x10x100 | CONSTRUCTION BAR | ||
4 | SIDE GUIDE 6x10x170 | BAUSTA | ||
5 | ARM STRIPES 6x18 | PINE | ||
6 | ARM STRIPS 2 mm | Plywood | ||
7 | FUSELAGE STRIPS 22x10x40 | BAUSTA | ||
8 | FUSELAGE STRIPS 4x10x12 | BAUSTA | ||
9 | FUSELAGE STRIPS 4x10x12 | BAUSTA | ||
10 | CENTER PIECE REINFORCEMENT 2x10x100 | Plywood | ||
11 | FUSELAGE STRIPS 4x10x12 | BAUSTA | ||
12 | FUSELAGE STRIPS 12x10x100 | BAUSTA | ||
13 | END STRIPS 2x18 | Plywood | ||
14 | EDGE STRIP 6 mm | BAUSTA | ||
15 | EDGE STRIP 1x10x10 | Plywood | ||
16 | EDGE STRIP 1x10x10 | PINE | ||
17 | END STRIP 2x18x180 | BAUSTA | ||
18 | EDGE STRIP 2 mm | Plywood | ||
19 | EDGE STRIP 2 mm | Plywood | ||
20 | EDGE STRIP 2 mm | Plywood | ||
21 | EDGE STRIP 2 mm | Plywood | ||
22 | EDGE STRIP 2 mm | Plywood | ||
23 | EDGE STRIP 2 mm | Plywood | ||
24 | EDGE STRIP 2 mm | Plywood | ||
25 | EDGE STRIP 2 mm | Plywood | ||
26 | EDGE STRIP 2 mm | Plywood | ||
27 | EDGE STRIP 2 mm | Plywood | ||
28 | EDGE STRIP 2 mm | Plywood | ||
29 | EDGE STRIP 2 mm | Plywood | ||
30 | EDGE STRIP 2 mm | Plywood | ||
31 | EDGE STRIP 2 mm | Plywood | ||
32 | EDGE STRIP 2 mm | Plywood | ||
33 | EDGE STRIP 2 mm | Plywood |


News from HEBU

TEAM MANAGER "THIS" BOSSHARD
 Rodito Nussbaumer

YOU KNOW WHAT I MEAN? 125 YEARS OF THE SWISS AERO CLUB
 Emil Giezendanner

HORIZON HOBBY/LEMACO NEWS: MICRO OV-10 BRONCO 645 MM BY E-FLITE

PRIDE AND GOOD IDEAS
 Markus Nussbaumer

TRY-OUT DAY AT MFV WETTINGEN
Urs Keller
F3A EUROPEAN CHAMPIONSHIPS IN ST-MACAIRE, FRANCE
 Matthias Bosshard

52. 2026 ALPS CUP
Emil Giezendanner
ATOM, THE NEW DOUBLE-DECKER FROM CPLR
Matthias Bosshard
SUMMER FUN 2026 AT MG USTER
Martin Wunderli
What's New at Leomotion.com

COUPE DES ALPES – OBSERVE AND LEARN
Rodito Nussbaumer
TWIN TOWN PARTNERSHIP
Wolfgang Voeller
BY YOUTH, FOR YOUTH
Lorena Betschen
34th HAHNENMOOS ALPINE MODEL AIRPLANE CAMP
Res Dauwalder
CORSAIR F4U – A WARBIRD WITH A MEMORABLE LOOK
Jürgen Rosenberger, Jürgen Prinz
SMALL, MODEL-LIKE SAILBOATS
Res Dauwalder
WELCOME, NEW MEMBER!
Andrea Bolliger
FREE FLIGHT IN THE MIDDLE OF SUMMER
Urs Muntwyler
EURO CONTEST GLIDER ACRO TOUR AUSTRIA 2026

INSIGHTS INTO THE HISTORY OF SEAPLANES

THE PC-21 STORY
Emil Giezendanner
NEWS FROM HEBU
 Julia Bucher

FROM 0 TO 100
Markus Nussbaumer
MEMORIES
Wolfgang Völler
NOS REGION – A HUB FOR ELECTRIC AVIATION
Emil Giezendanner
DO YOU KNOW WHAT I MEAN IN THE LAND OF SMILES?
Emil Giezendanner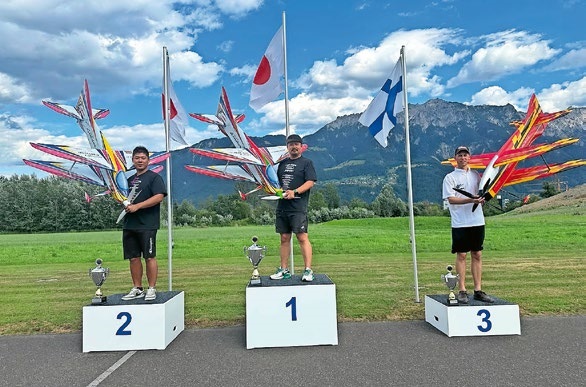
A SPECTACULAR F3A WORLD CUP IN THE PRINCIPALITY OF LIECHTENSTEIN
Emil Giezendanner