
Delicate Works of Art
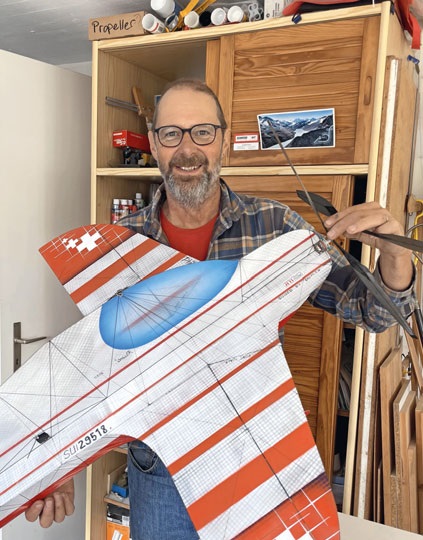
F3P indoor models are true works of art. Their takeoff weight is 50–55 grams, and the weight of the actual airframe is about 15 grams. How do you design and build such featherweights, and what do you need to keep in mind? To explore these topics, I visited Ruedi Gallati in his workshop.
Pilots in the indoor scene form a close-knit community that supports and helps one another. There are no secrets; they willingly discuss developments and improvements and celebrate each other’s successes. As a result, the models are optimized and improved, usually in small steps. Knowledge of materials and construction techniques is shared and tested. The models should be lightweight, fly slowly, and be easy to control—whether in normal flight, upside down, or in a knife-edge flight. To achieve this, a wide variety of wing surfaces and shapes are tested, including Canalizers and biplanes. These models are not available for purchase at any model shop; they are either built by the hobbyists themselves in small quantities or manufactured in France and Lithuania at various levels of pre-assembly.
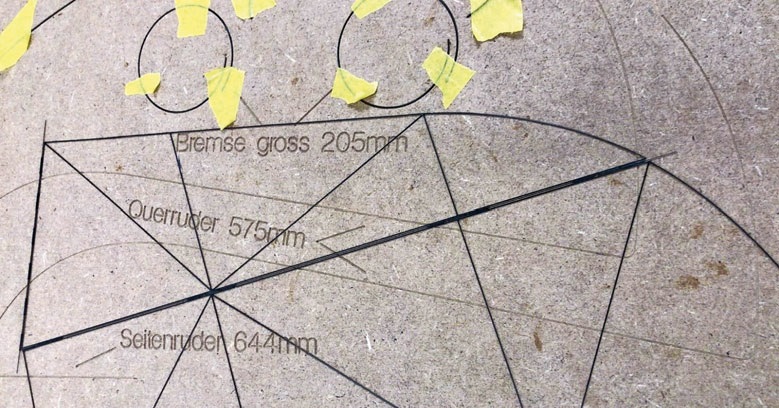
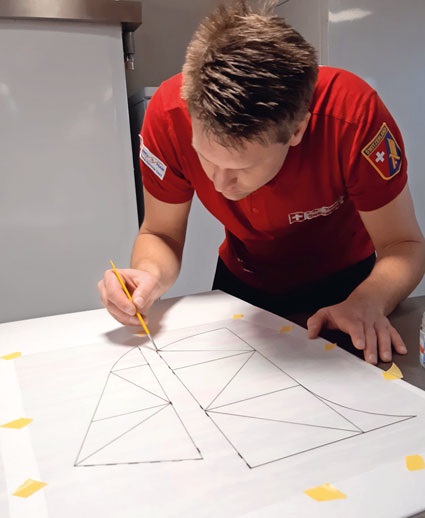
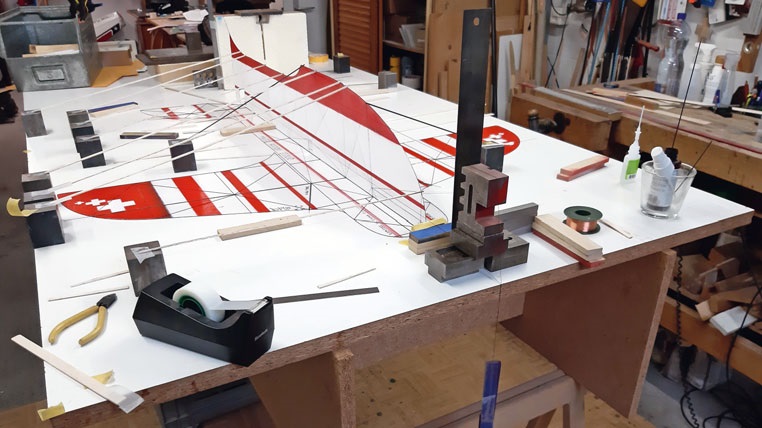
Depron, the foam material used for years, is a thing of the past; the models were very fragile and aged quickly. Today, carbon fiber rods and tubes of various diameters are required to build the fuselage and wing structures. The thickest are 0.7 mm, the thinnest 0.25 mm, and are therefore subjected only to tensile stress. Hardwood molds are used to build the models. The outlines and contours are milled into these molds. The CFRP rods are not forced into the molds—which would cause excessive stress—but are instead laminated within them. CFRP roving is impregnated with slow-curing resin and inserted into heat-shrink tubing along with a thread or fine steel wire. These are then shrunk using a hot-air gun and pressed into the recesses of the molds. After curing, the heat-shrink tubing is removed. In another mold, the individual rods are glued together at their intersections to form a lattice. The surfaces created in this way for the fuselage, wings, and elevator are covered with Mylar film (2 g per square meter). The film is crumpled before application so that it remains taut after bonding. Next, the Mylar film is placed on a flat board; the CFRP lattice is coated with diluted Uhu-Por, placed on top of the Mylar film, trimmed with a slight overlap, and pulled tight around the edges of the CFRP rods. The most delicate part is joining and bracing the individual parts. The more of these very fine bracing elements are attached to the model, the less one can
Hold the model in your hand or place it in a mounting jig. Ruedi has gotten used to applying the tiniest drops of superglue to the delicate joints. He uses magnifying glasses for this. He emphasizes that building a model like this requires a lot of patience and dexterity and that, for him, it has a meditative and relaxing quality. →
To improve visibility for pilots and judges, the model is decorated with airbrush paint. The finished model, without internal components, weighs approximately 15 grams.
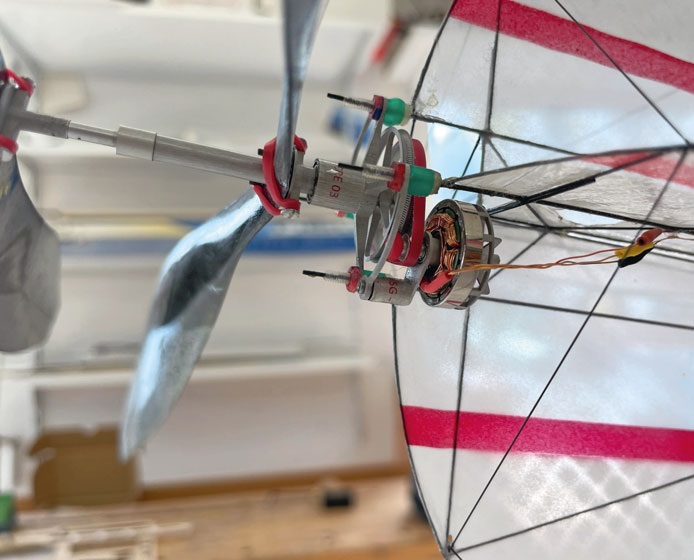
The coaxial drives are also sourced from industry insiders; the most common ones are from Glavak and Lantsov and can drive propellers up to 18 inches in diameter. The CFRP propellers are driven by reduction gears and a hollow shaft and weigh 2–3 grams. Experiments have also been conducted with pre-shaped balsa propellers. Servos are difficult to come by; tried-and-true accessories are purchased in large quantities and stockpiled for years. The servo cables and connectors are much too heavy and are replaced with 0.1 mm enameled copper wire. It is difficult to find micro-servos with high positioning accuracy.
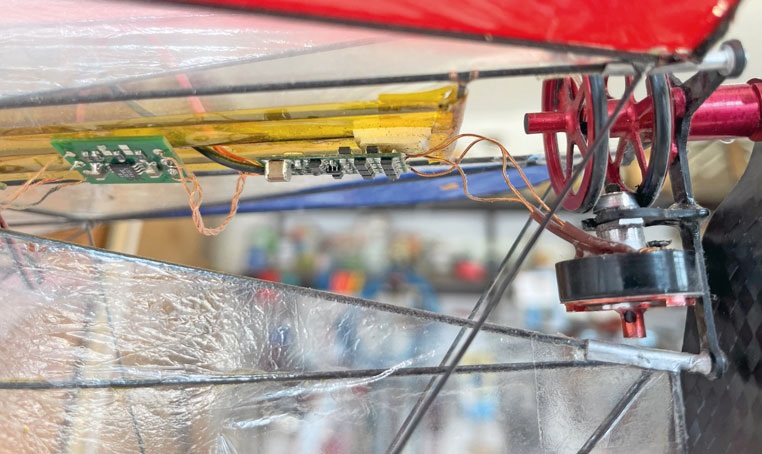
In some cases, the servos are mounted directly on the control shafts without control horns to achieve a play-free linkage and to save weight. It’s important to keep the center of gravity in mind. The center of gravity is balanced by the placement of the rudder servo and the battery. The receivers and the voltage regulators required for the 1S battery are also small and lightweight and are soldered in by the builder. A 1S LiPo with a capacity of 160 mAh provides 7–8 minutes of flight time. The propellers are V-shaped so that they have a stabilizing effect during torque maneuvers. Large propellers are highly efficient and provide better braking during downward maneuvers. Standard transmitters from well-known brands are used. Relatively few mixers are used; some pilots switch between different flight modes during flights. To control the braking effect, throughout the entire flight
An increased idle speed (idle-up) is set.
Once the finished F3P model is sitting on the workbench, in most cases 70–100 hours of labor and just under 1,000 euros in materials have been invested. The next challenge is flying in the model and adjusting the mixers, throttle curves, and flight modes on the transmitter to guide the model harmoniously through the aerobatic maneuvers and impress the judges with your skill. (Here, too, pilots exchange tips with one another at competitions.) That said, the best pilots are the ones who jerk the control stick the least; they compensate for the model’s quirks (shortcomings) before they even become apparent—“where pilot and model are one.” It looks effortless, but it’s the highest level of skill and a testament to the pilot’s talent.
What’s next? Ruedi Gallati believes that the possibilities for weight reduction—
The focus is on perfection. The level of perfection achieved is very high, and the sophisticated construction techniques have proven their worth. There were years when the weight could be reduced by up to 10 grams on a regular basis—but that’s now a thing of the past. Right now, the focus is on ensuring that the best pilot flies the optimal model. Incidentally, the models occasionally make contact with the floor or walls inside the hangar. The resulting damage is minor and can usually be repaired in a few minutes with a steady hand and a drop of superglue. Impressed by the dedication, the attention to detail, the craftsmanship, and also by the genuine camaraderie within the community, I leave Ruedi Gallati’s workshop.
- 1 Pilot and designer Ruedi Gallati.
- 2 Propulsion system by Glavak.
- 3 Propulsion system by Lantsov.
- 4 CFRP rod laminating molds.
- 5 Fabrication of the CFRP contours using Rowings in heat-shrink tubing.
- 6 Laminating the CFRP rods.
- 7 Removing the heat-shrink tubing from the laminated CFRP rods.
- 8 Removable wing with aileron.
- 9 Covering the CFRP frame with Mylar film.
- 10 Airbrushing.
- 11 Fuselage and wing assembly.
- 12 Assembly of the upper fuselage.
- 13 Adjustable motor mount.
- 14 Aileron servo.
- 15 A delicate work of art.


News from HEBU

TEAM MANAGER "THIS" BOSSHARD
 Rodito Nussbaumer

YOU KNOW WHAT I MEAN? 125 YEARS OF THE SWISS AERO CLUB
 Emil Giezendanner

F3A EUROPEAN CHAMPIONSHIPS IN ST-MACAIRE, FRANCE
 Matthias Bosshard

SUMMER FUN 2026 AT MG USTER
Martin Wunderli
TRY-OUT DAY AT MFV WETTINGEN
Urs Keller
52. 2026 ALPS CUP
Emil Giezendanner
BY YOUTH, FOR YOUTH
Lorena Betschen
ATOM, THE NEW DOUBLE-DECKER FROM CPLR
Matthias Bosshard
CORSAIR F4U – A WARBIRD WITH A MEMORABLE LOOK
Jürgen Rosenberger, Jürgen Prinz
SMALL, MODEL-LIKE SAILBOATS
Res Dauwalder
What's New at Leomotion.com

HORIZON HOBBY/LEMACO NEWS: MICRO OV-10 BRONCO 645 MM BY E-FLITE

TWIN TOWN PARTNERSHIP
Wolfgang Voeller
PRIDE AND GOOD IDEAS
 Markus Nussbaumer

EURO CONTEST GLIDER ACRO TOUR AUSTRIA 2026

INSIGHTS INTO THE HISTORY OF SEAPLANES

34th HAHNENMOOS ALPINE MODEL AIRPLANE CAMP
Res Dauwalder
WELCOME, NEW MEMBER!
Andrea Bolliger
FREE FLIGHT IN THE MIDDLE OF SUMMER
Urs Muntwyler
COUPE DES ALPES – OBSERVE AND LEARN
Rodito Nussbaumer
THE PC-21 STORY
Emil Giezendanner
NEWS FROM HEBU
 Julia Bucher

FROM 0 TO 100
Markus Nussbaumer
MEMORIES
Wolfgang Völler
NOS REGION – A HUB FOR ELECTRIC AVIATION
Emil Giezendanner
Have you almost forgotten about aircraft that take off and land vertically?
Emil Giezendanner
DO YOU KNOW WHAT I MEAN IN THE LAND OF SMILES?
Emil Giezendanner