
Sinus, an electric model in the Hot class: a great choice for both dedicated competition pilots and weekend flyers.
About two years ago, I suddenly felt that my trusty “Carrera Primus” was no longer right for me. Too slow, not enough climbing power, not suitable for acrobatics; in short, I needed a new model.
Browsing through catalogs, making a decision, and purchasing the model all took just a few days, especially since the level of pre-assembly and equipment promised a short build time. This turned out to be more or less true.
I don't want to list the assembly instructions word for word here, but rather just briefly go over the various subassemblies. Speaking of the assembly instructions: They're tailored to the intended user; yet they're still detailed enough—and even illustrated!
Slim, low-drag epoxy fuselage with an integrated vertical stabilizer. Painted white
and extremely lightweight. Both the elevator Bowden cable and the inserts for attaching the wings and tailplane are already embedded in the resin.
All that remains is to glue in the motor bulkhead—depending on the motor used—while ensuring a clean transition between the fuselage and the spinner. A Graupner spinner (Ø 38 mm) was used. The white topcoat on the fuselage was not entirely satisfactory. After just a few (gentle!) landings, it already showed various fine cracks.
It consists essentially of four balsa parts. The outer curves must be glued to the damping surface. Next, a plywood reinforcement (due to the screw fasteners) must be fitted and glued in place. After that, the horizontal stabilizer can be sanded down according to the cutout drawings.
For me, this turned into an extremely back-breaking task. The balsa wood was rock-hard, brittle, and relatively heavy. After adjusting the rudder, the horizontal stabilizer was ready for covering.
The surprisingly lightweight wing is made of Styrofoam with a
balsa wood skin. It’s reinforced with fabric in the right places. It took me more work than expected. One of the wing’s trailing edges was so warped that it looked more like a propeller than a wing. Soaking it repeatedly in hot water, then clamping it onto a straight surface and heating it with a hair dryer made the defect almost disappear. After working on it with a sanding block about 120 cm long, the trailing edges were just as they should be: straight!! Otherwise, the servo cables must be routed before gluing the balsa nose strips; the mounting reinforcements and balsa edge strips must be glued in place; and the wing halves must be sanded down.
The ailerons are already pre-milled lengthwise. They just need to be fully cut out, boxed in, and fitted.
The wingspan can be chosen depending on the intended use (180–200 cm). I left mine at about 200 cm.
After gluing the wing halves together, the wing can be fitted to the fuselage and the two holes for screw fastening can be drilled. Afterward, the wing center must be reinforced with a fiberglass sleeve.
Fitting and gluing a wing-to-fuselage transition piece made of thermoformed plastic completes the construction of the wing.
I had R. Hersberger put this together for me. My requirements for him were: as much power as possible with a maximum of seven cells! What he put together for me far exceeded my expectations!! The motor, a Keller 35/6, drives a Freudentaler carbon brush motor (RFM-150). Of course, only Sanyo cut-off cells (1200 mA/h) will do—anything else would be a waste of money. This drive package is started using a Sommerauer switch. The current draw is approximately 40 A when using an iron sheath.
According to D. Levin, the Sinus belongs to the “Hot Class”; this power system is practically tailor-made for it.
Many an uninitiated F3A pilot has been left in awe of the climb and flight performance of the 1,600-gram
Sinus.”
It stands to reason that in a model designed without compromise for performance and minimal drag, there isn’t much room left for the radio control system. Cheap servos and outdated receivers have no place here.
Both the wing and the fuselage can barely accommodate servos the size of an IMP-400. An MPX-Mini 7 was used as the receiver.
The entire system is powered by a 225 mA/h battery and a miniature switch. Since space is quite tight everywhere (I wonder where the designer plans to fit the promised 10 cells), the RC installation should be carried out with the utmost care and precision. No one wants to have to make changes after the fact!
The fuselage was left as it came from the kit. The wings and horizontal stabilizer were first treated with “Balsarite” and then covered with two-tone Oracover iron-on film. Incidentally, this film is extremely easy to work with; even sharp curves (such as wing tips, etc.) can be covered without any trouble with a little practice.
For the outer wing sections, I chose bright orange, which ensures good visibility of the aircraft’s attitude even in poor visibility.
The control surfaces were simply attached with thin white hinge tape. This holds rock-solid and also creates a seamless transition.
The aileron linkages were covered with the included plastic thermoformed parts, providing some protection during landings.
If you follow the designer's specifications regarding the center of gravity and rudder angles, nothing should really go wrong. The Sinus is in its element when launched with a strong push and the engine running—
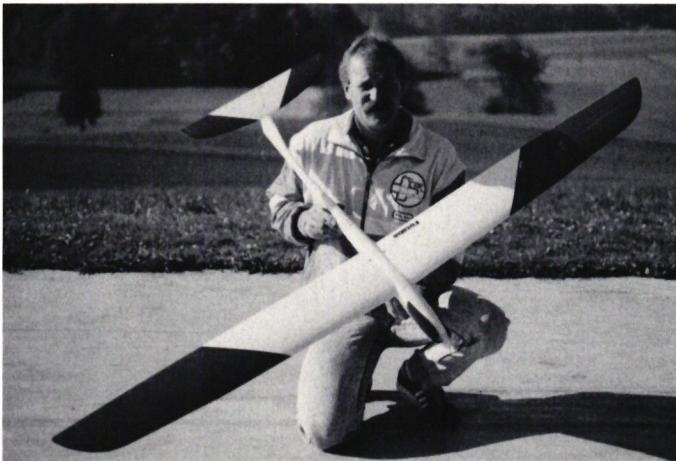
. You must always ensure you have sufficient speed. If you fly sluggishly, it will punish you with a stall followed by a sideways tilt, which can have particularly fatal consequences during the landing approach!
However, if you maintain sufficient airspeed, the Sinus is quite easy to fly and can be handled well by an average pilot.
For landing, it is recommended—for safety reasons alone—to raise both ailerons as a landing aid. Otherwise, the relatively high airspeed can easily cause you to overshoot the target.
This landing aid is included in the construction plans, and activating it should pose no problems with a modern RC system.
Due to the relatively high basic airspeed, downdraft zones can be flown through quickly. When flown within the optimal speed range, the model achieves good range performance.
I cannot comment on thermal performance, as it has not been tested. In my opinion, this is also of secondary importance for this model.
I am constantly fascinated by the model’s control effectiveness (control deflections as per the plan). While it is extremely direct and precise, it does not feel twitchy.
With the Sinus, provided you have the necessary dexterity, all standard aerobatic maneuvers can be flown without any problems. Whether it’s pulled, pushed, or snapped maneuvers, the model’s structural strength makes them absolutely no problem.
You rarely find yourself missing the rudder.
The seasoned
F3A competition pilot H. Peyer whenever he wants to really let loose with the Sinus! No wonder—it’s not even his model!!
We can only congratulate designer Werner Dettweiler on the Sinus. If you keep the essentials in mind, the Sinus can be wholeheartedly recommended to everyone from the average pilot on up.
Willy Böni


News from HEBU

EURO CONTEST GLIDER ACRO TOUR AUSTRIA 2026

TEAM MANAGER "THIS" BOSSHARD
 Rodito Nussbaumer

YOU KNOW WHAT I MEAN? 125 YEARS OF THE SWISS AERO CLUB
 Emil Giezendanner

F3A EUROPEAN CHAMPIONSHIPS IN ST-MACAIRE, FRANCE
 Matthias Bosshard

HORIZON HOBBY/LEMACO NEWS: MICRO OV-10 BRONCO 645 MM BY E-FLITE

PRIDE AND GOOD IDEAS
 Markus Nussbaumer

BY YOUTH, FOR YOUTH
Lorena Betschen
34th HAHNENMOOS ALPINE MODEL AIRPLANE CAMP
Res Dauwalder
TRY-OUT DAY AT MFV WETTINGEN
Urs Keller
52. 2026 ALPS CUP
Emil Giezendanner
TWIN TOWN PARTNERSHIP
Wolfgang Voeller
ATOM, THE NEW DOUBLE-DECKER FROM CPLR
Matthias Bosshard
CORSAIR F4U – A WARBIRD WITH A MEMORABLE LOOK
Jürgen Rosenberger, Jürgen Prinz
SUMMER FUN 2026 AT MG USTER
Martin Wunderli
What's New at Leomotion.com

THE PC-21 STORY
Emil Giezendanner
COUPE DES ALPES – OBSERVE AND LEARN
Rodito Nussbaumer
SMALL, MODEL-LIKE SAILBOATS
Res Dauwalder
WELCOME, NEW MEMBER!
Andrea Bolliger
FREE FLIGHT IN THE MIDDLE OF SUMMER
Urs Muntwyler
INSIGHTS INTO THE HISTORY OF SEAPLANES

NEWS FROM HEBU
 Julia Bucher

FROM 0 TO 100
Markus Nussbaumer
MEMORIES
Wolfgang Völler
NOS REGION – A HUB FOR ELECTRIC AVIATION
Emil Giezendanner
DO YOU KNOW WHAT I MEAN IN THE LAND OF SMILES?
Emil Giezendanner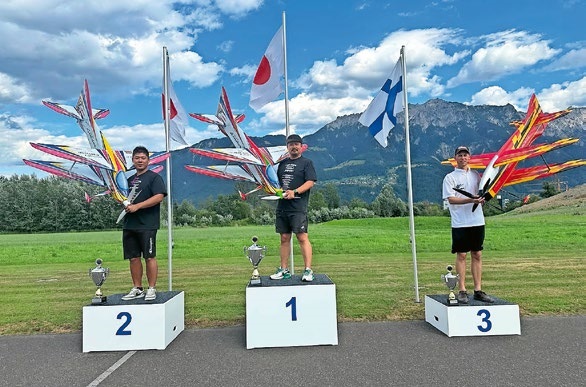
A SPECTACULAR F3A WORLD CUP IN THE PRINCIPALITY OF LIECHTENSTEIN
Emil Giezendanner