
A2 - Luckystar High-Performance Sailboat Model
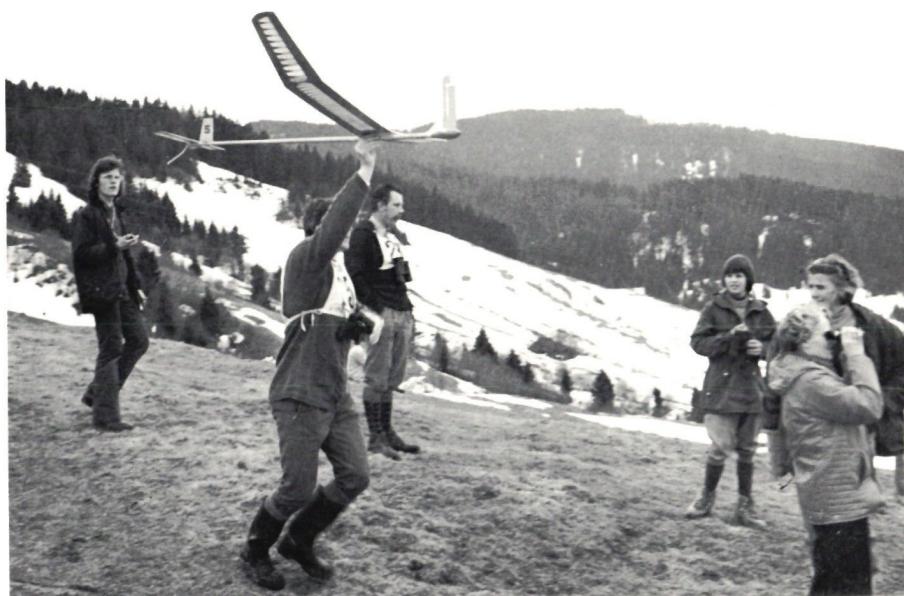
The prototype for this model was created in 1961 when six model airplane enthusiasts from the MG Zurich got together and each contributed their best ideas. Since then, over 30 different versions have been built and tested. Today, I am pleased to present this versatile model.
"Universal" means: The model can be used in both calm and windy conditions. The Thomen F4 airfoil with a 15 cm chord length has proven to be the best choice. Elevator profile: 6% camber. Flight times with 0.5 mm-thick turbulator corners range from 165 to 175 seconds. For model pilots who want to get even more out of their model, I recommend three models with wing depths of 14 cm (calm weather), 15 cm (as described), and 17 cm. Use the Thomen F6 profile (for windy weather). The sink rate is 0.29 m/sec. The model’s speed is 4–5 m/sec. At a 3° angle of attack, the center of gravity is located 102 mm from the leading edge of the wing. The model can be used as a magnetic glider with a different fuselage nose. For those who still have access to training facilities, it is advisable to install a timer.
The 1:1 scale plan, including the three wing variants, can be obtained from W. Heise, Im Isen grind 35, 8046 Zurich.
Fuselage: Cut 5 connecting ribs (Nos. 7 and 58) from 2 mm plywood. The 5th rib is further processed to serve as the template rib. We cut the fuselage center section (No. 1) from a hardwood board (8 mm thick). The pine strips (No. 2) are planed to the same dimensions. We assemble the fuselage on a Pavatex sheet, which must rest on a level surface. Join the center section with the pine strips. Insert the frames (No. 3). For wood-to-wood and wood-to-balsa joints, we use white glue (e.g., Syncolle). After a drying time of 1½ hours, we drill the two angled holes (Ø 2 mm) and insert the aluminum tube (No. 4). Now we plank the fuselage on both sides with the 6 mm board (No. 5), working from back to front, so that the tongue rests against the hardwood board (No. 1). Glue on the two wing attachment ribs; then we plane them into a rough shape and sand them down to their final form with sandpaper. At a right angle, we drill a hole (Ø 3 mm) for attaching the wings. Insert the brass tubes (Ø 3/4 and Ø 2/3) into these holes, file them flush with the rib, and slightly widen them with a cone, since the wing will take on a slight V-shape.
After two coats of paint, the entire fuselage is covered with thin Japanese paper and painted. As a final step, we glue all tail section parts in place according to the plan and screw on the adjustable high-launch hook (No. 10—not as shown in the plan). A nylon thread with a ring (No. 11) for the turn release mechanism is threaded through. The brass nose (No. 6) is firmly attached.
The wings are built in the same way as the main wing. According to the plan, only every second rib is drawn; that is, the intermediate ribs are cut slightly shorter.
To achieve a smooth wing joint, we assemble the airframe using straight steel wires and carefully sand it down. The airframe is painted and covered with medium-weight Japanese paper.
First, glue the pine reinforcements to the front and end strips, then attach them to the template using auxiliary strips so that the underside matches the profile’s curvature. Once we have drilled the holes for the brass tubes (Nos. 33/34), we temporarily assemble them and insert this framework into the spars. The brass joints are glued with Aralgit. The ribs, cut to size using the template rib, are then inserted. The corner reinforcements (No. 53) are also glued in place. After the glue has dried, we first glue in the lower planking (No. 36). The upper planking surface is now sanded to the correct profile, and the upper planking (No. 35), which rests approximately 2 mm above the nose spar, is glued in place. Secure them with pins rather than clothespins; pins do not leave marks on the balsa wood. Glue in the triangles (No. 57). Also glue in the support blocks (No. 54), which form the main spar. Insert fairings (1.6 mm balsa) at the wing joint.
It is important to use only lightweight balsa wood for the horizontal stabilizer; the maximum weight is 12 grams. The construction process is the same as for the wing. Cover with thin Japanese paper. Glue all steel hooks in place using Aralgit.
If you built the section behind the wing lightly, you’ll now need to saw off a bit of the fuselage nose to achieve the correct center of gravity. Use the adjustment screw on the elevator to set the exact angle. Now you can attempt your first glide tests. Make adjustments to the set screw until, in calm conditions, you achieve a glide distance of 25 meters with your hand held high. The model must also be weighed. Minimum weight: 410 grams.
This will be described in detail in the next issue. W. Heise
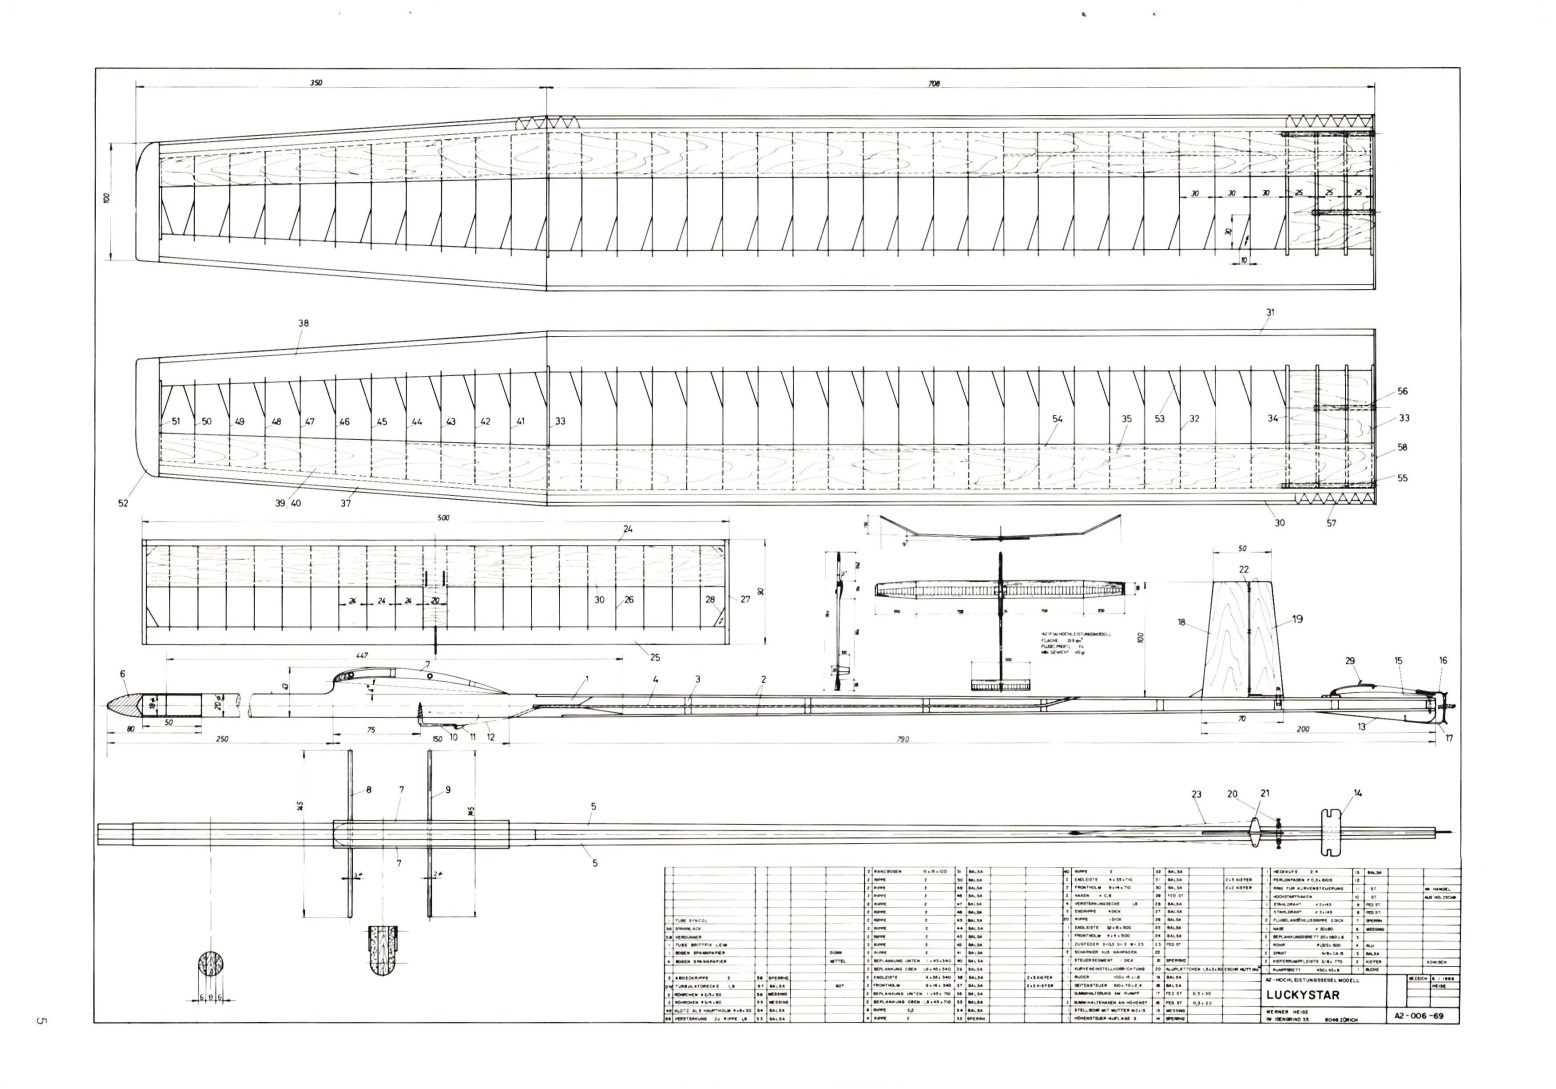
Dimensions:
- Top View: 350 (width), 700 (length), 100 (height), 30, 30, 30, 25, 25, 25 (tail section).
- Side View: 500 (length), 24 (width), 27 (height), 28 (width), 26 (width), 30 (width), 37 (width), 39 (width), 40 (width), 41 (width), 42 (width), 43 (width), 44 (width), 45 (width), 46 (width), 47 (width), 48 (width), 49 (width), 50 (width), 51 (width), 52 (width), 53 (width), 54 (width), 55 (width), 56 (width), 57 (width), 58 (width), 59 (width).
- Front View: 790 (length), 100 (height), 200 (width), 13 (width), 15 (width), 16 (width), 17 (width), 18 (width), 19 (width), 20 (width), 21 (width), 22 (width), 23 (width), 24 (width), 25 (width), 26 (width), 27 (width), 28 (width), 29 (width), 30 (width), 31 (width), 32 (width), 33 (width), 34 (width), 35 (width), 36 (width), 37 (width), 38 (width), 39 (width), 40 (width), 41 (width), 42 (width), 43 (width), 44 (width), 45 (width), 46 (width), 47 (width), 48 (width), 49 (width), 50 (width), 51 (width), 52 (width), 53 (width), 54 (width), 55 (width), 56 (width), 57 (width), 58 (width), 59 (width).
Parts List:
| Part | Material | Dimensions | Quantity |
|---|---|---|---|
| 1. TUBE STICHEL | STICHEL | 100 x 100 | 1 |
| 2. TUBE BRITTELL | BRITTELL | 100 x 100 | 1 |
| 3. TUBE BRITTELL | BRITTELL | 100 x 100 | 1 |
| 4. ROSEN STANDBLATT | STANDBLATT | 100 x 100 | 1 |
| 5. ROSEN STANDBLATT | STANDBLATT | 100 x 100 | 1 |
| 6. ROSEN STANDBLATT | STANDBLATT | 100 x 100 | 1 |
| 7. ROSEN STANDBLATT | STANDBLATT | 100 x 100 | 1 |
| 8. ROSEN STANDBLATT | STANDBLATT | 100 x 100 | 1 |
| 9. ROSEN STANDBLATT | STANDBLATT | 100 x 100 | 1 |
| 10. ROSEN STANDBLATT | STANDBLATT | 100 x 100 | 1 |
| 11. ROSEN STANDBLATT | STANDBLATT | 100 x 100 | 1 |
| 12. ROSEN STANDBLATT | STANDBLATT | 100 x 100 | 1 |
| 13. ROSEN STANDBLATT | STANDBLATT | 100 x 100 | 1 |
| 14. ROSEN STANDBLATT | STANDBLATT | 100 x 100 | 1 |
| 15. ROSEN STANDBLATT | STANDBLATT | 100 x 100 | 1 |
| 16. ROSEN STANDBLATT | STANDBLATT | 100 x 100 | 1 |
| 17. ROSEN STANDBLATT | STANDBLATT | 100 x 100 | 1 |
| 18. ROSEN STANDBLATT | STANDBLATT | 100 x 100 | 1 |
| 19. ROSEN STANDBLATT | STANDBLATT | 100 x 100 | 1 |
| 20. ROSEN STANDBLATT | STANDBLATT | 100 x 100 | 1 |
| 21. ROSEN STANDBLATT | STANDBLATT | 100 x 100 | 1 |
| 22. ROSEN STANDBLATT | STANDBLATT | 100 x 100 | 1 |
| 23. ROSEN STANDBLATT | STANDBLATT | 100 x 100 | 1 |
| 24. ROSEN STANDBLATT | STANDBLATT | 100 x 100 | 1 |
| 25. ROSEN STANDBLATT | STANDBLATT | 100 x 100 | 1 |
| 26. ROSEN STANDBLATT | STANDBLATT | 100 x 100 | 1 |
| 27. ROSEN STANDBLATT | STANDBLATT | 100 x 100 | 1 |
| 28. ROSEN STANDBLATT | STANDBLATT | 100 x 100 | 1 |
| 29. ROSEN STANDBLATT | STANDBLATT | 100 x 100 | 1 |
| 30. ROSEN STANDBLATT | STANDBLATT | 100 x 100 | 1 |
| 31. ROSEN STANDBLATT | STANDBLATT | 100 x 100 | 1 |
| 32. ROSEN STANDBLATT | STANDBLATT | 100 x 100 | 1 |
| 33. ROSEN STANDBLATT | STANDBLATT | 100 x 100 | 1 |
| 34. ROSEN STANDBLATT | STANDBLATT | 100 x 100 | 1 |
| 35. ROSEN STANDBLATT | STANDBLATT | 100 x 100 | 1 |
| 36. ROSEN STANDBLATT | STANDBLATT | 100 x 100 | 1 |
| 37. ROSEN STANDBLATT | STANDBLATT | 100 x 100 | 1 |
| 38. ROSEN STANDBLATT | STANDBLATT | 100 x 100 | 1 |
| 39. ROSEN STANDBLATT | STANDBLATT | 100 x 100 | 1 |
| 40. ROSEN STANDBLATT | STANDBLATT | 100 x 100 | 1 |
| 41. ROSEN STANDBLATT | STANDBLATT | 100 x 100 | 1 |
| 42. ROSEN STANDBLATT | STANDBLATT | 100 x 100 | 1 |
| 43. ROSEN STANDBLATT | STANDBLATT | 100 x 100 | 1 |
| 44. ROSEN STANDBLATT | STANDBLATT | 100 x 100 | 1 |
| 45. ROSEN STANDBLATT | STANDBLATT | 100 x 100 | 1 |
| 46. ROSEN STANDBLATT | STANDBLATT | 100 x 100 | 1 |
| 47. ROSEN STANDBLATT | STANDBLATT | 100 x 100 | 1 |
| 48. ROSEN STANDBLATT | STANDBLATT | 100 x 100 | 1 |
| 49. ROSEN STANDBLATT | STANDBLATT | 100 x 100 | 1 |
| 50. ROSEN STANDBLATT | STANDBLATT | 100 x 100 | 1 |
| 51. ROSEN STANDBLATT | STANDBLATT | 100 x 100 | 1 |
| 52. ROSEN STANDBLATT | STANDBLATT | 100 x 100 | 1 |
| 53. ROSEN STANDBLATT | STANDBLATT | 100 x 100 | 1 |
| 54. ROSEN STANDBLATT | STANDBLATT | 100 x 100 | 1 |
| 55. ROSEN STANDBLATT | STANDBLATT | 100 x 100 | 1 |
| 56. ROSEN STANDBLATT | STANDBLATT | 100 x 100 | 1 |
| 57. ROSEN STANDBLATT | STANDBLATT | 100 x 100 | 1 |
| 58. ROSEN STANDBLATT | STANDBLATT | 100 x 100 | 1 |
| 59. ROSEN STANDBLATT | STANDBLATT | 100 x 100 | 1 |
LUCKYSTAR
WERNER HEISE
IM BÜRO 35 8040 ZÜRICH
AZ-006-69


News from HEBU

TEAM MANAGER "THIS" BOSSHARD
 Rodito Nussbaumer

YOU KNOW WHAT I MEAN? 125 YEARS OF THE SWISS AERO CLUB
 Emil Giezendanner

F3A EUROPEAN CHAMPIONSHIPS IN ST-MACAIRE, FRANCE
 Matthias Bosshard

HORIZON HOBBY/LEMACO NEWS: MICRO OV-10 BRONCO 645 MM BY E-FLITE

PRIDE AND GOOD IDEAS
 Markus Nussbaumer

34th HAHNENMOOS ALPINE MODEL AIRPLANE CAMP
Res Dauwalder
TRY-OUT DAY AT MFV WETTINGEN
Urs Keller
52. 2026 ALPS CUP
Emil Giezendanner
EURO CONTEST GLIDER ACRO TOUR AUSTRIA 2026

ATOM, THE NEW DOUBLE-DECKER FROM CPLR
Matthias Bosshard
CORSAIR F4U – A WARBIRD WITH A MEMORABLE LOOK
Jürgen Rosenberger, Jürgen Prinz
SUMMER FUN 2026 AT MG USTER
Martin Wunderli
What's New at Leomotion.com

THE PC-21 STORY
Emil Giezendanner
COUPE DES ALPES – OBSERVE AND LEARN
Rodito Nussbaumer
TWIN TOWN PARTNERSHIP
Wolfgang Voeller
BY YOUTH, FOR YOUTH
Lorena Betschen
SMALL, MODEL-LIKE SAILBOATS
Res Dauwalder
WELCOME, NEW MEMBER!
Andrea Bolliger
FREE FLIGHT IN THE MIDDLE OF SUMMER
Urs Muntwyler
INSIGHTS INTO THE HISTORY OF SEAPLANES

NEWS FROM HEBU
 Julia Bucher

FROM 0 TO 100
Markus Nussbaumer
MEMORIES
Wolfgang Völler
NOS REGION – A HUB FOR ELECTRIC AVIATION
Emil Giezendanner
DO YOU KNOW WHAT I MEAN IN THE LAND OF SMILES?
Emil Giezendanner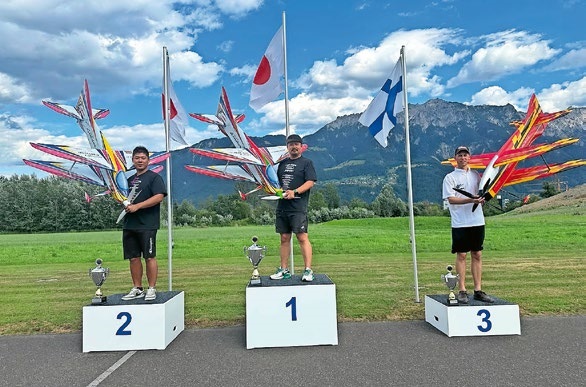
A SPECTACULAR F3A WORLD CUP IN THE PRINCIPALITY OF LIECHTENSTEIN
Emil Giezendanner