
The Simprop Jet Ranger
The following tips are for helicopter newbies; the experts already know better anyway.
1. If the Jet Ranger is built and adjusted precisely according to the assembly instructions, it will hover very stably. However, the following modifications are recommended:
- a Route the tail rotor drive shaft through a tube
- b Slightly enlarge the tail rotor
- c If possible, use the cooling plate for the motor
- d Slightly tension the timing belt by shimming the motor; otherwise, it will break soon.
2. Use only a reliable radio control system with the most powerful and precise servos available. The helicopter presents enough challenges on its own, and compared to a fixed-wing model, it’s harder to determine whether erratic flight behavior is due to a malfunctioning servo or a fault in the complex control linkage.
3. Practice hovering until you’ve got it down perfectly—both forward and backward—before attempting circular flights. If you’re flying on grass, we recommend using a cross-shaped frame made of 2-meter-long aluminum tubes that are bent upward at the ends. Inflatable floats have proven to be even more effective.
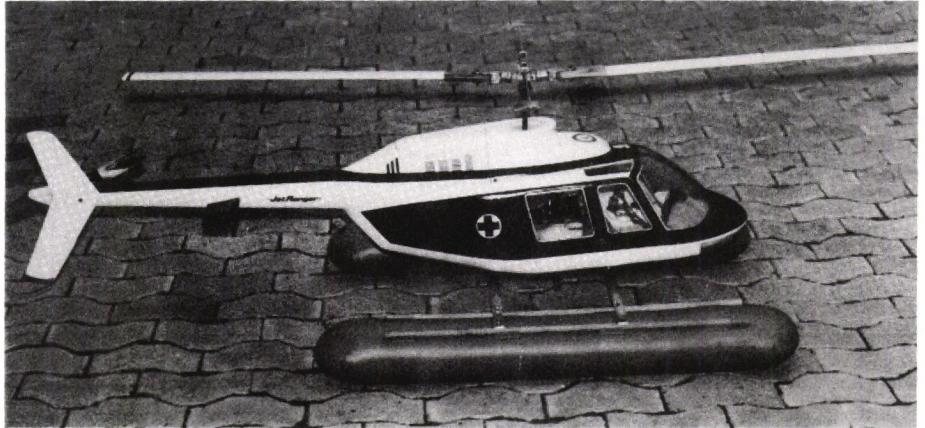
4. During hover flight training, you develop your ability to discern the nuances of the—unfortunately—loud engine noise. Hover flight outside the ground effect, at an altitude of about 2 meters and above, demands the highest performance; therefore, the engine must be tuned so that it runs smoothly at this altitude. At the slightest sign of the engine surging, land immediately. Set the carburetor on the rich side. Do not rely on a so-called autorotation landing, as this term has so far been used in helicopter models to describe a crash in which not only the fuselage but also the rotor is destroyed because it is still rotating upon impact. Use only clean fuel. The carburetor setting for idle may present some difficulties, since collective pitch control maintains a high engine RPM even at relatively low power output. To prevent a sudden stall in the transition zone between full throttle and idle, it may be necessary to open the idle jet needle further than usual, which in turn results in a very rich idle mixture. This must be accepted, because in forward flight—especially during the landing approach—only about half the hover power is required.
5. Adjusting the pitch ratio between the main and tail rotors is a bit of a test of patience and must be corrected until the model performs abrupt climbs and descents between 1 and 3 m in altitude without any significant tendency to rotate around the vertical axis. Below 1 m, the balance is no longer quite correct due to the ground effect, so some countersteering is required. Takeoff therefore normally requires a half-turn of the control stick to the right.
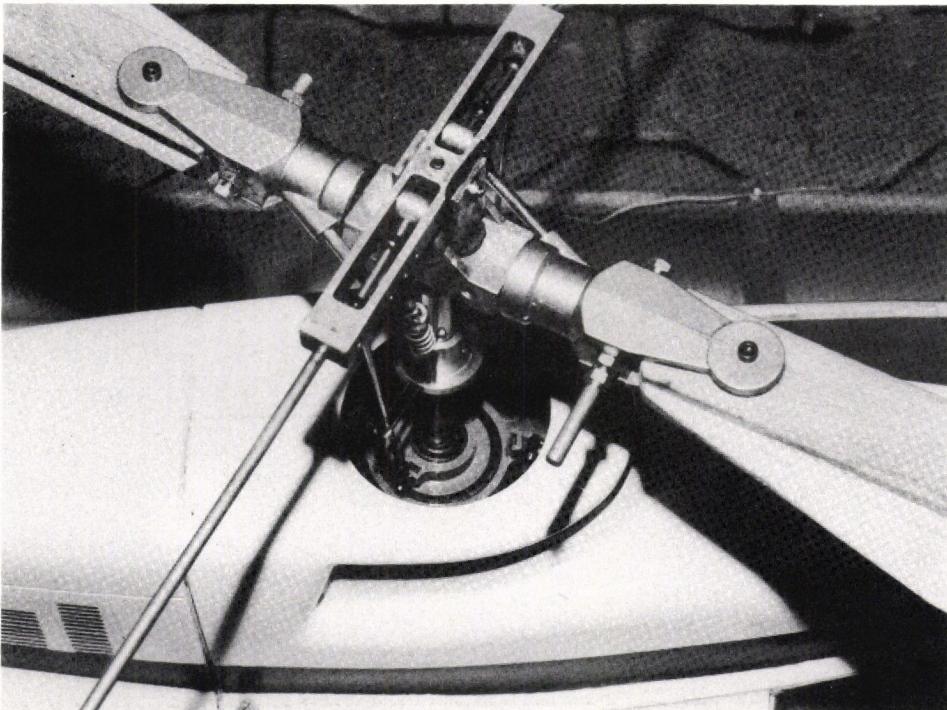
- Check whether the engine is actually adjusted correctly by letting it idle for a while.
- Windy weather is unsuitable; an obstacle-free field is preferable.
- After an initial hover, apply a little pressure briefly; the model will then pick up speed after a short delay and climb away.
- Gradually reduce throttle so that the model maintains an altitude of about 20 m.
- Maintain forward flight! To do this, apply a little forward pressure or bank the helicopter into a shallow turn, which will also cause it to accelerate. If you leave the control stick in the neutral position, the model will gradually come to a stop, even begin to move backward slightly, and rotate around its vertical axis, at which point it will start to sink rapidly. If this happens at an unfamiliar distance, it’s easy to lose your nerve.
- Never attempt vertical landings from a great height! Even at a low rate of descent, the helicopter can suddenly drop sharply and can only be recovered by pushing the throttle fully forward and then performing a nosedive—provided there is sufficient altitude.
- To land, fly slowly toward yourself against the wind while descending gradually and allow the model to slow down. In doing so, you must gradually increase power, as lift decreases as speed decreases. Only when you’re close enough do you finally bring the model to a stop by pulling the control stick back slightly, so that it comes to a halt at a height of just under one meter and can be set down without any major problems.
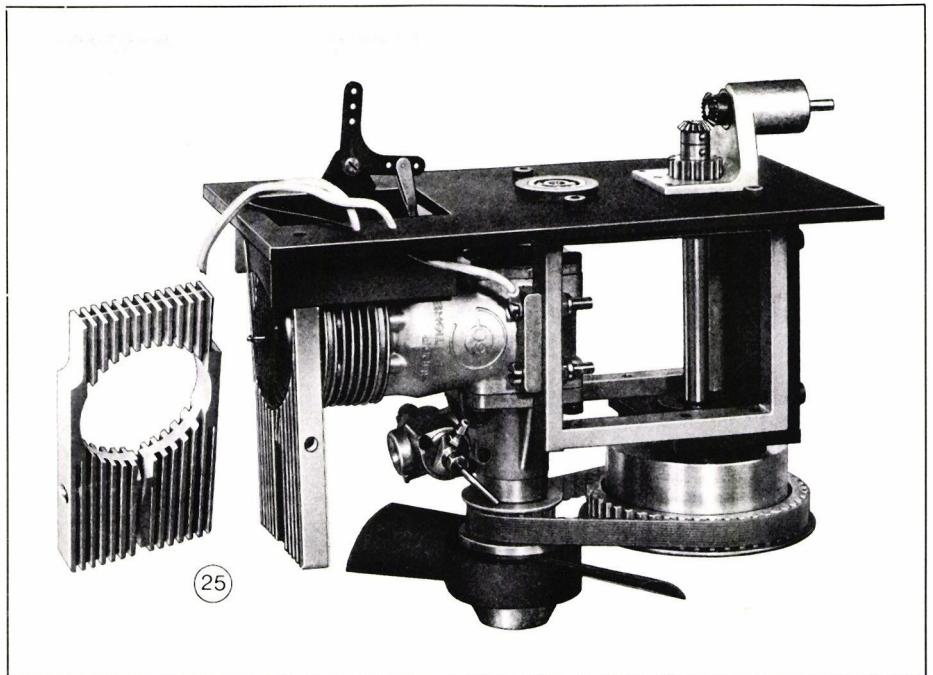
Any crashes that have occurred point to certain issues with how the stabilizing rocker behaves during tight turns and rapid recovery maneuvers, and we’re tinkering with suitable modifications.
In conclusion, it should be emphasized that flying model helicopters may seem a bit confusing at first, but practice makes perfect, and the whole thing is a lot of fun. To avoid unnecessary damage and setbacks, a certain degree of systematic approach and care is, of course, required, along with a bit of theory—which only makes the whole thing all the more interesting.


News from HEBU

TEAM MANAGER "THIS" BOSSHARD
 Rodito Nussbaumer

YOU KNOW WHAT I MEAN? 125 YEARS OF THE SWISS AERO CLUB
 Emil Giezendanner

F3A EUROPEAN CHAMPIONSHIPS IN ST-MACAIRE, FRANCE
 Matthias Bosshard

SUMMER FUN 2026 AT MG USTER
Martin Wunderli
TRY-OUT DAY AT MFV WETTINGEN
Urs Keller
52. 2026 ALPS CUP
Emil Giezendanner
BY YOUTH, FOR YOUTH
Lorena Betschen
ATOM, THE NEW DOUBLE-DECKER FROM CPLR
Matthias Bosshard
CORSAIR F4U – A WARBIRD WITH A MEMORABLE LOOK
Jürgen Rosenberger, Jürgen Prinz
SMALL, MODEL-LIKE SAILBOATS
Res Dauwalder
What's New at Leomotion.com

TWIN TOWN PARTNERSHIP
Wolfgang Voeller
PRIDE AND GOOD IDEAS
 Markus Nussbaumer

EURO CONTEST GLIDER ACRO TOUR AUSTRIA 2026

INSIGHTS INTO THE HISTORY OF SEAPLANES

34th HAHNENMOOS ALPINE MODEL AIRPLANE CAMP
Res Dauwalder
WELCOME, NEW MEMBER!
Andrea Bolliger
HORIZON HOBBY/LEMACO NEWS: MICRO OV-10 BRONCO 645 MM BY E-FLITE

FREE FLIGHT IN THE MIDDLE OF SUMMER
Urs Muntwyler
COUPE DES ALPES – OBSERVE AND LEARN
Rodito Nussbaumer
THE PC-21 STORY
Emil Giezendanner
NEWS FROM HEBU
 Julia Bucher

FROM 0 TO 100
Markus Nussbaumer
MEMORIES
Wolfgang Völler
NOS REGION – A HUB FOR ELECTRIC AVIATION
Emil Giezendanner
Have you almost forgotten about aircraft that take off and land vertically?
Emil Giezendanner
DO YOU KNOW WHAT I MEAN IN THE LAND OF SMILES?
Emil Giezendanner