
Hughes MD-500D “Magnum” by Roban
With its 800 Super Scale Series, Roban offers a wide range of popular model helicopter types. All models feature a high degree of pre-assembly, including pre-installed HSM mechanics, so you can start flying your scale model in no time.
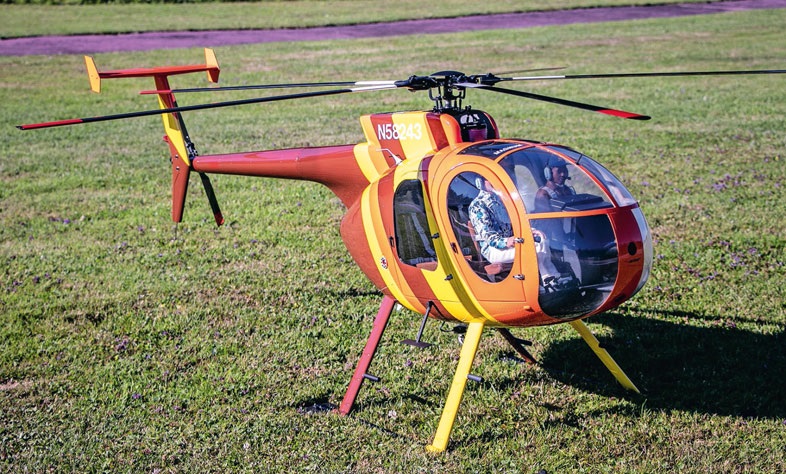
The package always includes numerous scale accessories that significantly enhance the model's appearance. With these kits, even a beginner with limited financial resources and little modeling experience can build a scale model based on a real-world prototype, gain a foothold in the scale modeling community, and achieve success. This is exactly what a veteran of the scene wanted to prove, so he built the MD-500D “Magnum” with registration number N58243 and modified it “a little.”
The manufacturer Roban (based in China) has regularly expanded its product line in recent years. Models in sizes 470, 600, 700, and 800 are manufactured and sold. The model range extends from the Eurocopter AS-350 to the Bell 429. Once you’ve found the model you want, you can choose from a variety of color schemes. If none of these suit your needs, most models are also available in a primed version, allowing you to customize the paint job to your liking.
The 600, 700, and 800 models come with the HSM-600, 700, or 800 mechanical systems, also manufactured by Roban. Model-specific parts, such as an angle gear for a raised tail rotor, scale skids, etc., are included in the kit. The kits also include the rotor head, tail rotor, main and tail rotor blades, fixed drive shaft, the complete illuminated cockpit, and many scale and small parts. For those who prefer to install their own components, some fuselages are also available separately.
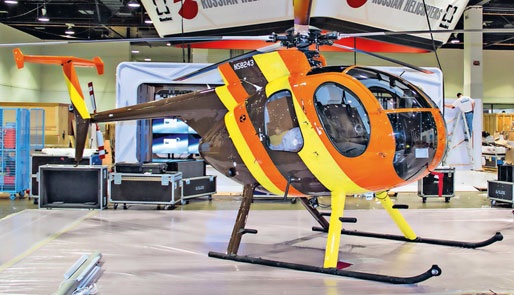
Franz Planzer from Wiedlisbach in the canton of Bern is no stranger to the scale modeling scene. For years, he has been building a wide variety of models as replicas of their real-life counterparts. For quite some time now, he, too, has been interested in the topic of “the next generation.” With a model costing less than CHF 5,000, he wanted to see if a Roban model could meet the scale community’s requirements and be suitable for them. After all, a model doesn’t always have to have a turbine engine and a rotor diameter of more than two meters.
His attention was drawn to the legendary Hughes MD-500D by TC (Pilot Theodore Calvin) from the Magnum series. The 800-scale size is quite impressive for this model and corresponds to a 1:4.5 scale.
This report aims to share his experiences and impressions of this model; perhaps it will inspire one or two people to give scale flying a try.
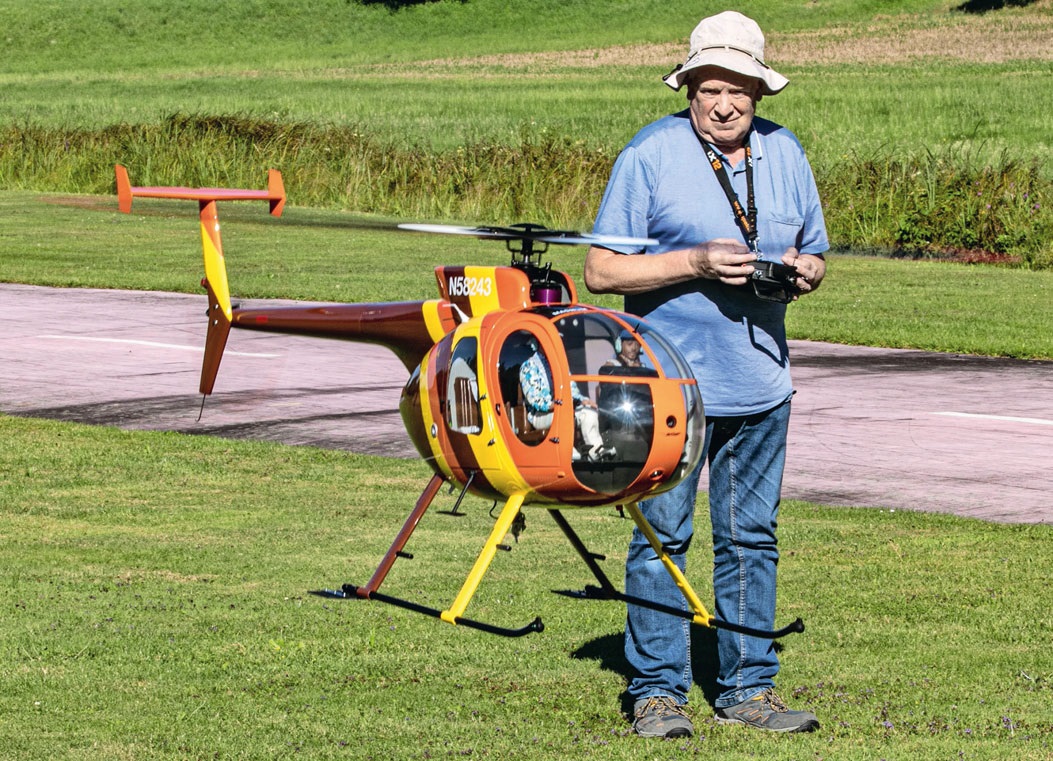
The fuselage and tail units are already fully painted in the colors ordered by customers, and the frames are glued in place. The mechanical parts and accessories are neatly numbered by assembly group and packed in separate plastic bags. The quality of the individual components and the paint job are top-notch. During his preliminary research on the model, there was a lot of talk about the weak design of the straight-cut main gearbox. To avoid any unpleasant surprises, Franz decided right from the start to convert the HSM-800 to the helical-tooth variant. Unfortunately, this conversion kit must be ordered separately.
The overall construction of the model and its mechanics is of very high quality and deserves great praise. Certainly, one or two things could be done better, but the product isn’t a one-off; it’s mass-produced, which inevitably leads to the need for one or two adjustments or improvements for the scale modeler. But that’s precisely the challenge of our wonderful hobby.
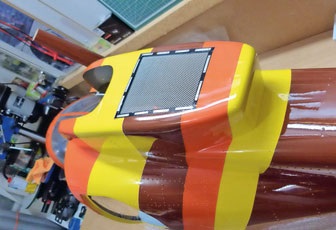
The real-life model has a large air intake grille at the top near the dome, which is missing from the scale model. Franz Planzer, of course, added this to the model. Such a distinctive feature simply cannot be left out of a scale model. To achieve this, he used a Dremel to carefully cut out the opening in the painted fuselage. He sawed the necessary frame out of plywood and glued the fine mesh screen onto it. The finished ventilation grille was glued into the fuselage from the inside. To avoid having to repaint anything, he covered the outside of the frame with adhesive film.
Another modification involves the desired quick battery swap for the two 6S 5200 mAh flight batteries. To avoid having to remove the front section of the cabin every time, an opening was milled out in the rear section of the cabin floor. A matching cover with holding magnets was made from the cut-out piece. The flight batteries can now be inserted with the cables running toward the rear, which not only hides them in the floor but also eliminates the need for extension cables to the ESC.
To improve the appearance, the entire cockpit floor was covered with a self-adhesive imitation checker plate, which is available at any hardware store.
The front headlight is included in the package, but the manufacturer “forgot” to include a corresponding opening in the fuselage. Franz Planzer carefully cut this out using a step drill. He replicated the flange using a plumbing gasket and secured it to the fuselage with micro Allen screws. The remaining lighting—some of which is already installed—is also included in the package, along with the lighting module, which can be controlled via the RC system. The only thing is that, for many, the light elements are a bit dim, but they can easily be replaced with brighter ones.
Since the model was built only in semi-scale, the builder couldn’t resist adding the “Magnum and T.C.” lettering to the roof windows. →
| Fuselage length: | 1.98 m |
| Rotor diameter: | 1.72 m (Witte blades) |
| Skid width: | 0.59 m |
| Height: | 0.645 m |
| Takeoff weight, including battery: | 11.5 kg |
| Propulsion motor: | Hacker A50-10L Turnado V3 kv530 |
| Controller: | Kontronik JIVE PRO 120+ HV |
Before installing the cockpit for the first time, the clips inside the fuselage must be adjusted. Since these are included in the kit ready for painting, you must proceed with the necessary care. The kit includes a backlit cockpit complete with a control stick, pitch lever, and pedals.
Of course, the modeler painted the seats brown to match the real aircraft.
To further enhance the cockpit’s appearance, seat belts were added to the seats. Additional scale parts inside, such as fire extinguishers and map pockets, round out the overall look of the cockpit. These scale parts are not included in the kit.
Another visual enhancement is the air intake for the cabin ventilation. This was made from a flexible hose purchased at an electronics store. The two upper cabin windows were tinted dark, just like on the real aircraft; for this, Franz used a Lexan tinting spray from the RC car accessories section.
The rear seats can be removed and are held in place by magnets, allowing quick access to the battery cover.
One of the more involved tasks is cutting out and gluing the windows onto the doors and fuselage. The scale model pro’s secret tip: “ZAP Canopy Glue Formula 560.” It dries crystal clear, doesn’t discolor, and remains very flexible.
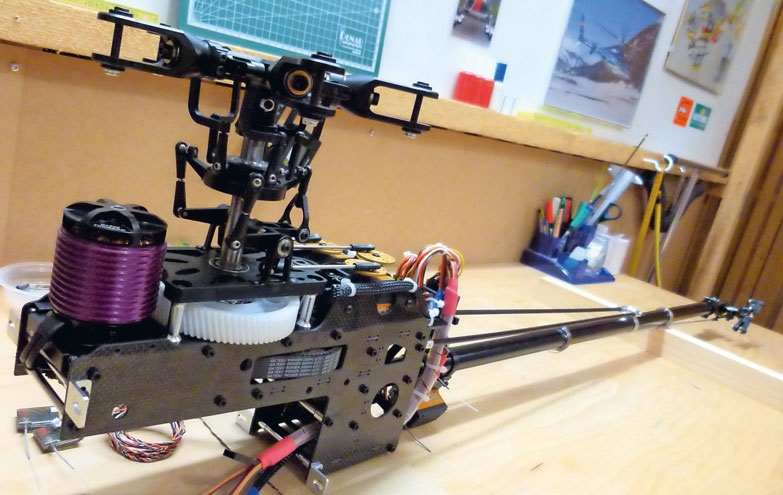
Behind the rear panel, there is space for the light module, the separate lighting battery, and the corresponding switch with charging port. Also neatly stowed there are the backup battery for the receiver’s BEC, the electronic switch from PowerBox-Systems, and the JIVE PRO 120+ HV controller from Kontronik. Thanks to the chosen layout of the ESC, as already mentioned, the cables to the flight battery did not need to be extended, and the cables from the ESC to the motor only needed to be extended by 10 centimeters.
Thanks to the rear panel and rear seats, all the electronics are hidden from view from the outside; only the two switches are accessible from the cockpit side, and nothing needs to be disassembled to turn them on or off.
While disassembling the mechanism, Franz converted the HSM-800 mechanism to helical gearing. To do this, he had to almost completely disassemble the mechanism, which had already been pre-assembled. However, while doing so, the somewhat odd-looking factory grease on the rear drive was completely removed and cleaned with acetone. It was replaced with the well-known, high-quality DryFluid Gear Lube. (Currently, the gearboxes are shipped with helical gearing.) A Hacker A50-10L Turnado V3 kv530 (with a long shaft) is installed as the drive motor. Four Savöx SC-1258TG servos are installed on the swashplate and for the tail. The builder mounted the Bavarian Demon 3X on the rear platform of the gear assembly and placed the receiver directly behind it, allowing all relevant cables to be kept short. Another major advantage is that the entire mechanical assembly, including the electronics, can be quickly installed and removed from the fuselage when maintenance is required. The tail boom is not load-bearing but serves only as a fairing.
The 5-blade aluminum rotor head blends harmoniously into the dome area and closely resembles the original. The quality of the rotor head, as well as the tail rotor, impressed even a critical model builder like Franz. He uses it as is.
The original is equipped with a load hook. Of course, this was an essential feature for the model as well. The load hook, purchased from A.L.K. Modellbau in 5304 Endingen, is anodized and very well made. It comes with a built-in servo, fully assembled and adjusted. It fits the Hughes perfectly and is mounted exactly at the center of gravity.
The first flights also revealed that the model tends to sink at the rear when on the ground. Franz solved this problem with a custom-built anti-sink device.
A crew modeled after the original—T.C. and Magnum—rounds out the cockpit scene. The pilots are from Scale Axel’s Pilots.
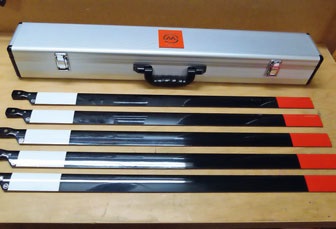
The rotor blades included with the kit did not perform well during flight testing and were replaced with symmetrical rotor blades by Stefan Witte. With the 777 × 40 mm blades, this problem was also resolved. →
Overall, Franz was thoroughly impressed by the kit and the experiment of building a semi-scale helicopter for under CHF 5,000. The kit, which includes the fuselage, mechanical components, rotor head, tail rotor, and plenty of accessories, can be assembled without any problems, even by a beginner. All the critical steps that could cause a beginner to fail during assembly have already been largely completed. The detailed, illustrated instructions definitely contribute to a successful model.
In terms of flight behavior—whether during a sightseeing flight or while hovering—the model is very precise, responsive, and easy to handle. “I fly this model at two different head speeds: 1,200 RPM for hovering and 1,400 RPM for more dynamic flights,” Franz Planzer reveals in closing.
Unfortunately, we have learned in recent weeks that Scaleflying.de, the European importer, has announced the end of its partnership with Roban. In the meantime, the European inventory has been practically sold out. Hopefully, Roban will find an acceptable solution in the near future, as the models are very popular and widely used. ■
Photos: Erich Sardella, Franz Planzer


News from HEBU

TEAM MANAGER "THIS" BOSSHARD
 Rodito Nussbaumer

YOU KNOW WHAT I MEAN? 125 YEARS OF THE SWISS AERO CLUB
 Emil Giezendanner

HORIZON HOBBY/LEMACO NEWS: MICRO OV-10 BRONCO 645 MM BY E-FLITE

PRIDE AND GOOD IDEAS
 Markus Nussbaumer

34th HAHNENMOOS ALPINE MODEL AIRPLANE CAMP
Res Dauwalder
TRY-OUT DAY AT MFV WETTINGEN
Urs Keller
F3A EUROPEAN CHAMPIONSHIPS IN ST-MACAIRE, FRANCE
 Matthias Bosshard

52. 2026 ALPS CUP
Emil Giezendanner
ATOM, THE NEW DOUBLE-DECKER FROM CPLR
Matthias Bosshard
SUMMER FUN 2026 AT MG USTER
Martin Wunderli
What's New at Leomotion.com

THE PC-21 STORY
Emil Giezendanner
COUPE DES ALPES – OBSERVE AND LEARN
Rodito Nussbaumer
TWIN TOWN PARTNERSHIP
Wolfgang Voeller
EURO CONTEST GLIDER ACRO TOUR AUSTRIA 2026

BY YOUTH, FOR YOUTH
Lorena Betschen
CORSAIR F4U – A WARBIRD WITH A MEMORABLE LOOK
Jürgen Rosenberger, Jürgen Prinz
SMALL, MODEL-LIKE SAILBOATS
Res Dauwalder
WELCOME, NEW MEMBER!
Andrea Bolliger
FREE FLIGHT IN THE MIDDLE OF SUMMER
Urs Muntwyler
INSIGHTS INTO THE HISTORY OF SEAPLANES

NEWS FROM HEBU
 Julia Bucher

FROM 0 TO 100
Markus Nussbaumer
MEMORIES
Wolfgang Völler
NOS REGION – A HUB FOR ELECTRIC AVIATION
Emil Giezendanner
DO YOU KNOW WHAT I MEAN IN THE LAND OF SMILES?
Emil Giezendanner
A SPECTACULAR F3A WORLD CUP IN THE PRINCIPALITY OF LIECHTENSTEIN
Emil Giezendanner